 Apparel
 Auto, Home & Tools
 Bags
 Business & Office Products
 Drinkware
 Food & Candy
 Outdoor & Leisure
 Stationery
 Technology
 Toys & Novelties
 Wellness and Safety
 Writing

 Bookmarks
 Booklets
 Brochures
 Business Cards
 Custom Calendars
 Door Hangers
 Envelopes
 Event Tickets
 Flyers
 Greeting Cards
 Hang Tags
 Invitation Cards
 Labels
 Letterheads
 Magnets
 Menus
 NCR Forms
 Postcards
 Presentation Folders
 Rack Cards
 Sales Sheets
 Stickers
 Trading Cards
 Table Tents

 Banners
 Canvas
 Decals
 Event Tents
 Flags
 Posters
 Reflective Signs
 Signs
 Table Covers
 Tension Fabric Displays
 Trade Show Booths





Foil Stamping Explained: How It Works and How to Design for It
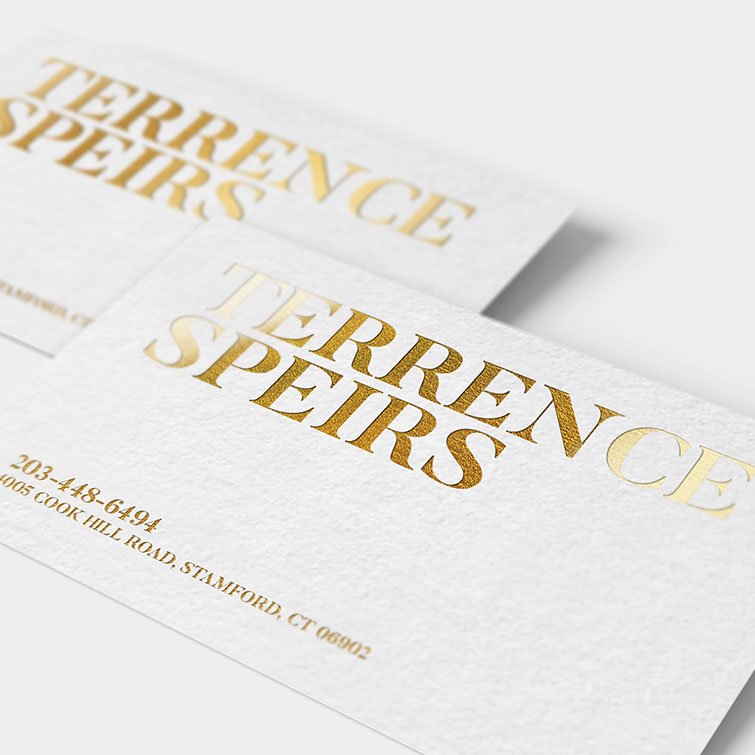
Foil stamping is one of the oldest tricks in fine printing, and still one of the most effective. A thin layer of real metallic foil is pressed into the paper with heat, leaving a solid, mirror-bright shine that no ink can copy. This guide covers how the process works, how to pick a foil color and paper, how to pair foil with Spot UV, the design rules that make foil look crisp, and how to set up your files.
Key Takeaways
- Foil stamping transfers a metallic film onto paper using a heated die and pressure.
- It gives one solid foil color, brighter than metallic ink.
- We offer 7 foil colors: gold, silver, rose gold, copper, black, blue and red.
- Foil can go on the front or on both sides, in the same color.
- Keep foil text 8 pt or larger and avoid hairline strokes.
- You’ll upload CMYK artwork plus a foil mask: foil areas in 100% K, as vector art.
How Foil Stamping Works, Step by Step
- Your mask becomes a die. The foil mask file, a black-and-white version of your design that shows only the foil areas, is used to make a metal stamping die.
- The sheet is printed first. Your full-color artwork prints on the stock, leaving space where the foil will go.
- Heat and pressure. The heated die presses a roll of foil film against the printed sheet. Where the die touches, the foil’s adhesive layer bonds to the paper.
- The rest peels away. The film lifts off, leaving a solid metallic layer exactly in the shape of your design.
- Finishing. Spot UV, lamination, cutting and rounded corners come next, depending on your options.
Because the die presses into the sheet, foil has a slight pressed-in feel, especially on uncoated paper. That subtle depth is part of its appeal.
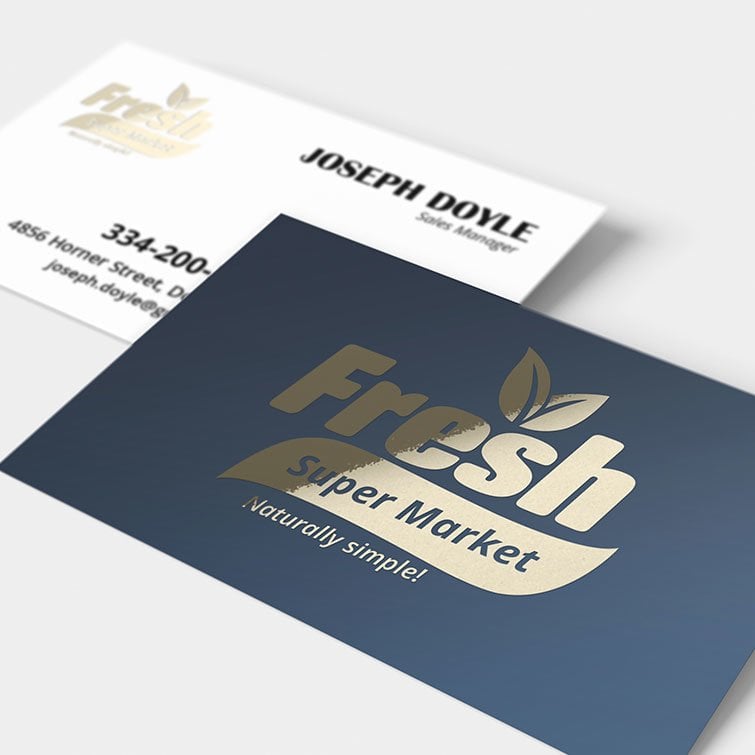
Foil Stamping vs. Metallic Ink vs. Other Metallic Finishes
| Finish | How it’s made | What you see |
|---|---|---|
| Foil stamping | Heated die presses a metallic film into the paper | One solid, mirror-bright foil color |
| Metallic ink | Ink with metallic particles, printed on press | A soft, satin sheen, much less reflective |
| Akuafoil | CMYK printed over a silver foil base | Metallic in any color, including gradients |
| Raised foil | Foil applied over a raised layer | Gold, silver or holographic foil you can feel |
Choose foil stamping when you want the classic look: one pure metal color on a logo, name, border or monogram. Choose Akuafoil for many metallic colors, and raised foil when texture matters most.
Choosing a Foil Color
We stamp in gold, silver, rose gold, copper, black, blue and red. Gold is the most requested, silver reads modern, rose gold is warm and romantic, and copper feels crafted. Black foil on black paper creates a subtle tone-on-tone gloss. For a full walkthrough, read how to choose your foil color.
How Paper Changes the Look of Foil
- 16 pt C2S (coated): the smoothest surface, so foil lands sharp and fine details hold. Add silk lamination for a smooth satin touch.
- 14 pt uncoated: a natural, toothy paper. The die presses the foil in a little deeper for a softer, letterpress-like effect, and it’s easy to write on. Spot UV isn’t offered on uncoated stocks.
- 32 pt Ultra Thick uncoated: for business cards (3.5″ x 2″), in gold or silver foil. The extra thickness gives foil the weight of engraved stationery.
Foil on One Side or Both?
Every foil card, mailer and tag can have foil on the front only or on both sides (with full-color printing on both sides), and the foil color is the same front and back. Foil on both sides is a simple way to make the back of a card feel as finished as the front. See design ideas for foil on both sides.
Pairing Foil With Spot UV
Spot UV adds a clear, glossy coating to chosen areas. The best designs use the two as complementary elements: the logo and name in foil, and icons, a tagline, a photo or a pattern in Spot UV. Each element catches the light differently, which gives the design depth and a clear order to read in. Spot UV is offered on 16 pt C2S stock. The two finishes need separate masks and separate areas; they shouldn’t overlap.
Design Rules for Crisp Foil
- Text 8 pt or larger. Thin serifs and script fonts need enough stroke weight to hold foil.
- No hairlines. Very thin lines can break up or fill in.
- Be careful with tiny knockouts. Small text reversed out of a foil area can fill in.
- Large solid areas can show slight texture. Bold shapes, lines and type stamp most evenly.
- Mind the edges. Keep foil 1/8″ inside the trim.
- Use contrast. Foil on dark backgrounds looks rich; on white or cream it looks crisp.
- Leave room to write on uncoated stock, and keep writing areas free of Spot UV and lamination.
Common Foil Mistakes (and Easy Fixes)
| Mistake | Fix |
|---|---|
| Foil mask in gray or a color | Use solid 100% K black only |
| Mask doesn’t line up with the artwork | Build it from a copy of the artwork file, same size and position |
| Ink printed under the foil | Leave foil areas clear or set them to the background color |
| Two foil colors in one design | Pick one color per order, or see dual raised or Akuafoil |
| Fine print or a QR code in foil | Keep small text and codes in ink |
| Spot UV touching the foil | Give each finish its own area with a little space between |
How to Set Up a Foil Mask File
- Download the template for your product and size.
- Design your artwork in CMYK with 1/8″ bleed.
- Duplicate the artwork. Turn every foil element solid 100% K black and everything else white.
- Keep it vector: outline fonts and use shapes, not photos.
- Repeat for the back if you’re foiling both sides. Add a separate Spot UV mask if needed.
- Save each as a PDF with clear names, like Front-CMYK, Front-Foil-Mask and Front-SpotUV-Mask.
Our prepress team checks every mask, and you’ll get a free proof before anything is stamped. Prefer to hand it off? Our designers can build the mask for you. Full details are in the foil file setup guide.
Which Foil Product Is Right for You?
- Foil Business Cards: three stocks, square and slim sizes, including gold foil on 32 pt Ultra Thick
- Foil Invitation Cards and Flat Foil Greeting Cards: weddings, holidays and thank-yous
- Foil Postcards and Foil Flyers: mailers, handouts, menus and events
- Foil Trading Cards: foil borders, armor, logos and set symbols
- Foil Hang Tags and Bottle Neck Foil Hang Tags: product and bottle tags
- Foil Presentation Folders: matching folders for your cards and handouts
See them all in our foil stamping collection, or order a sample kit to see and feel foil in person.
Need help with your foil design? Chat live, call (888) 391-0199, or see our Foil Printing FAQs.
Frequently Asked Questions
What is foil stamping?
A process that uses a heated metal die and pressure to transfer a thin metallic foil film onto paper, creating a solid, reflective foil design.
Is foil stamping the same as hot foil stamping?
Yes. Hot foil stamping is the full name; the heat activates the foil’s adhesive so it bonds to the paper.
How is foil different from metallic ink?
Metallic ink has a soft, satin sheen. Foil is a real metallic film, so it’s much brighter and mirror-like.
What foil colors can I choose?
Gold, silver, rose gold, copper, black, blue and red. 32 pt Ultra Thick business cards come in gold or silver.
What’s the smallest text I can foil?
Keep foil text at 8 pt or larger and avoid hairline strokes.
Can I use foil and Spot UV together?
Yes, on 16 pt C2S stock. Use them on complementary elements, each with its own mask, in separate areas that don’t overlap.
Does foil look different on uncoated paper?
Yes. On uncoated stock the foil presses in slightly deeper for a softer, letterpress-like look. Coated stock gives the sharpest detail.
How do I make a foil mask?
Duplicate your artwork, make the foil elements solid 100% K black and everything else white, keep it vector and save it as a PDF.
 Signs